December Nature Craft: Holiday pine cone trees
When you go on a nature walk with a 4 and 2 year old you often find yourself with handfuls of pine cones, sticks, rocks, and all kinds of things. "Can you hold this" and "look what I found!" becomes the chorus of the outing. Mostly, we appreciate the object for what it is, a seed pod, a cool shaped leaf or even a dead bug. But on a recent outing while carrying unopened pine cones we noticed they looked like little pine trees. What if we painted them green and glued a popsicle stick stand to the bottom? Here is a step by step tutorial, but you might not even need one. The idea is very simple. First…
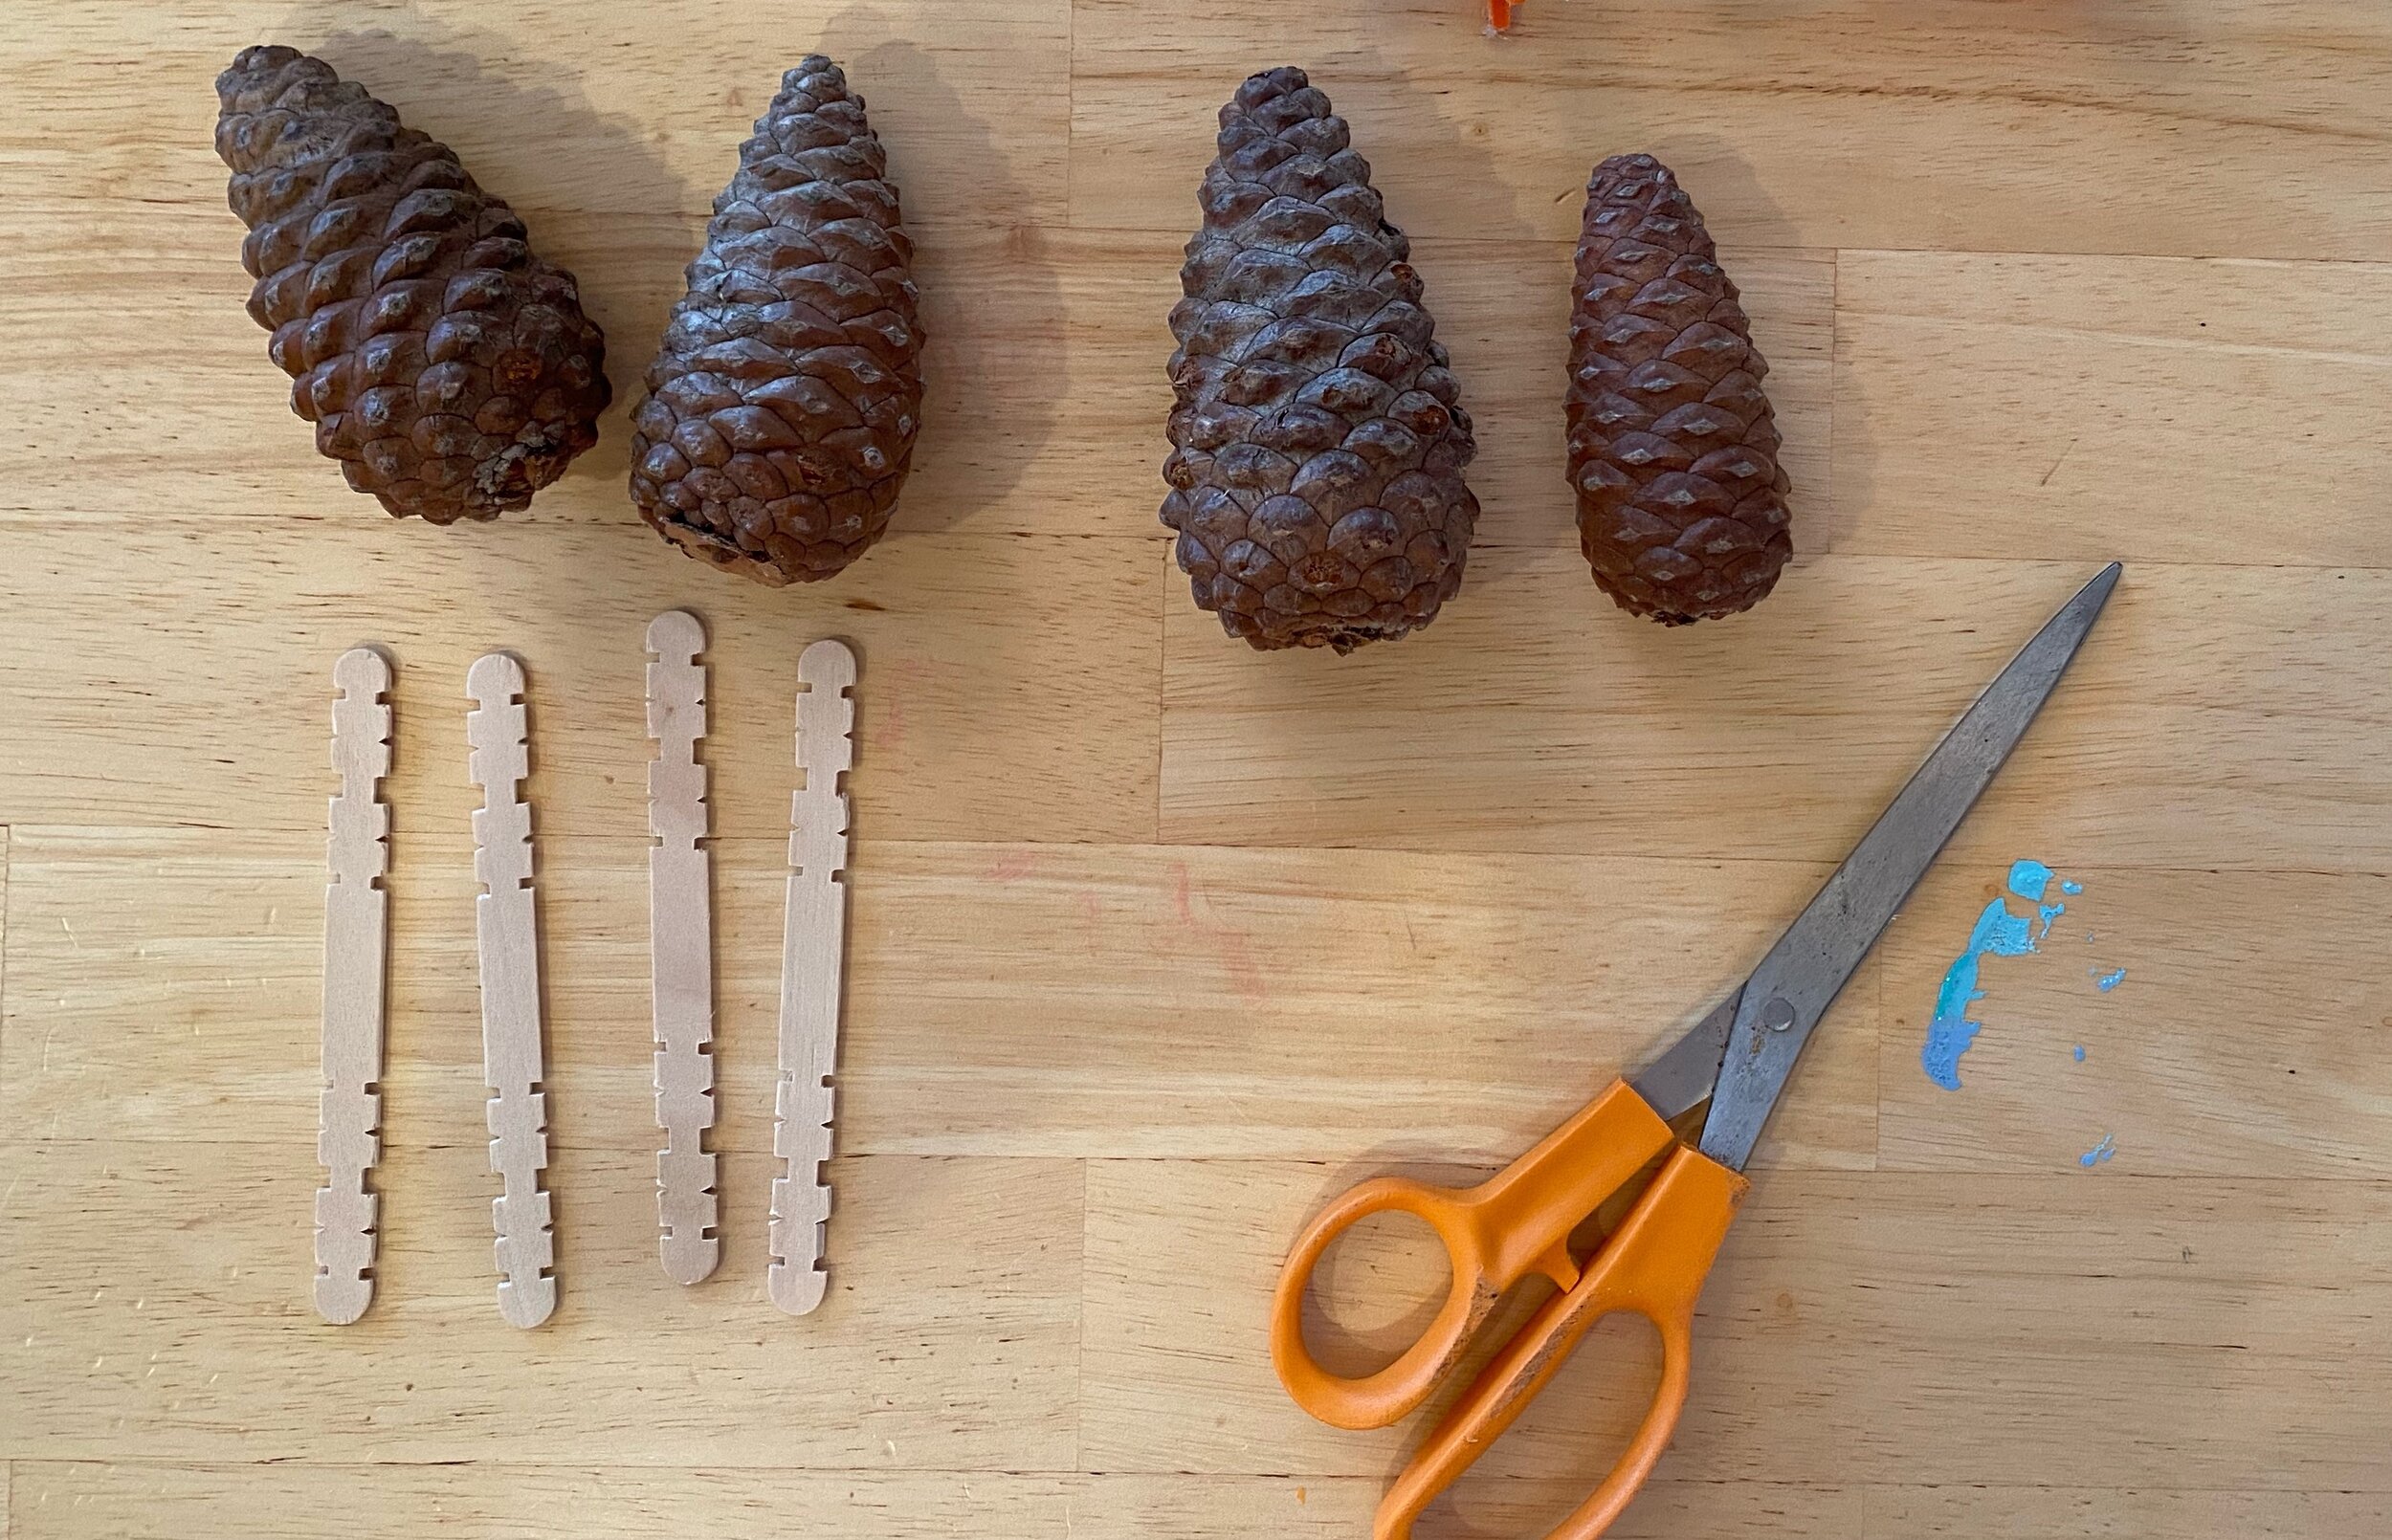
Collect 4-6 unopened pine cones (of course you can choose as many or as few). If all you can find is opened pine cones, well that works too. The pine cones we used for this project were found on a walking path in PV. Make sure you do not take items from a protected preserve.
Wash pine cones and let dry. This will make sure there is no dirt to prevent the paint from going on smooth and sticking.
Prepare your tree stands. You will want to attach the stands before you paint your trees. Depending on the size of your pine cones you should only need one clean popsicle stick per pine cone. We cut ours in half with regular all purpose scissors. Create an X with your popsicle halves. From here you have one of two choices. 1st option: For a truly eco-conscious version, using a hammer and a thin guage nail under 3/4” long, drive the nail through the center of the x, into the pine cone. This step should be completed by an adult. 2nd option is to use school glue, or hot glue. School glue will need time to dry and set.
Paint the stands. If you are using glue, paint the stands after you glue them to the pine cones. Paint may interfere with the adhesiveness of the glue. If you are using a nail to secure the stands to the pine cone, paint the stands before you attach them for a cleaner look.
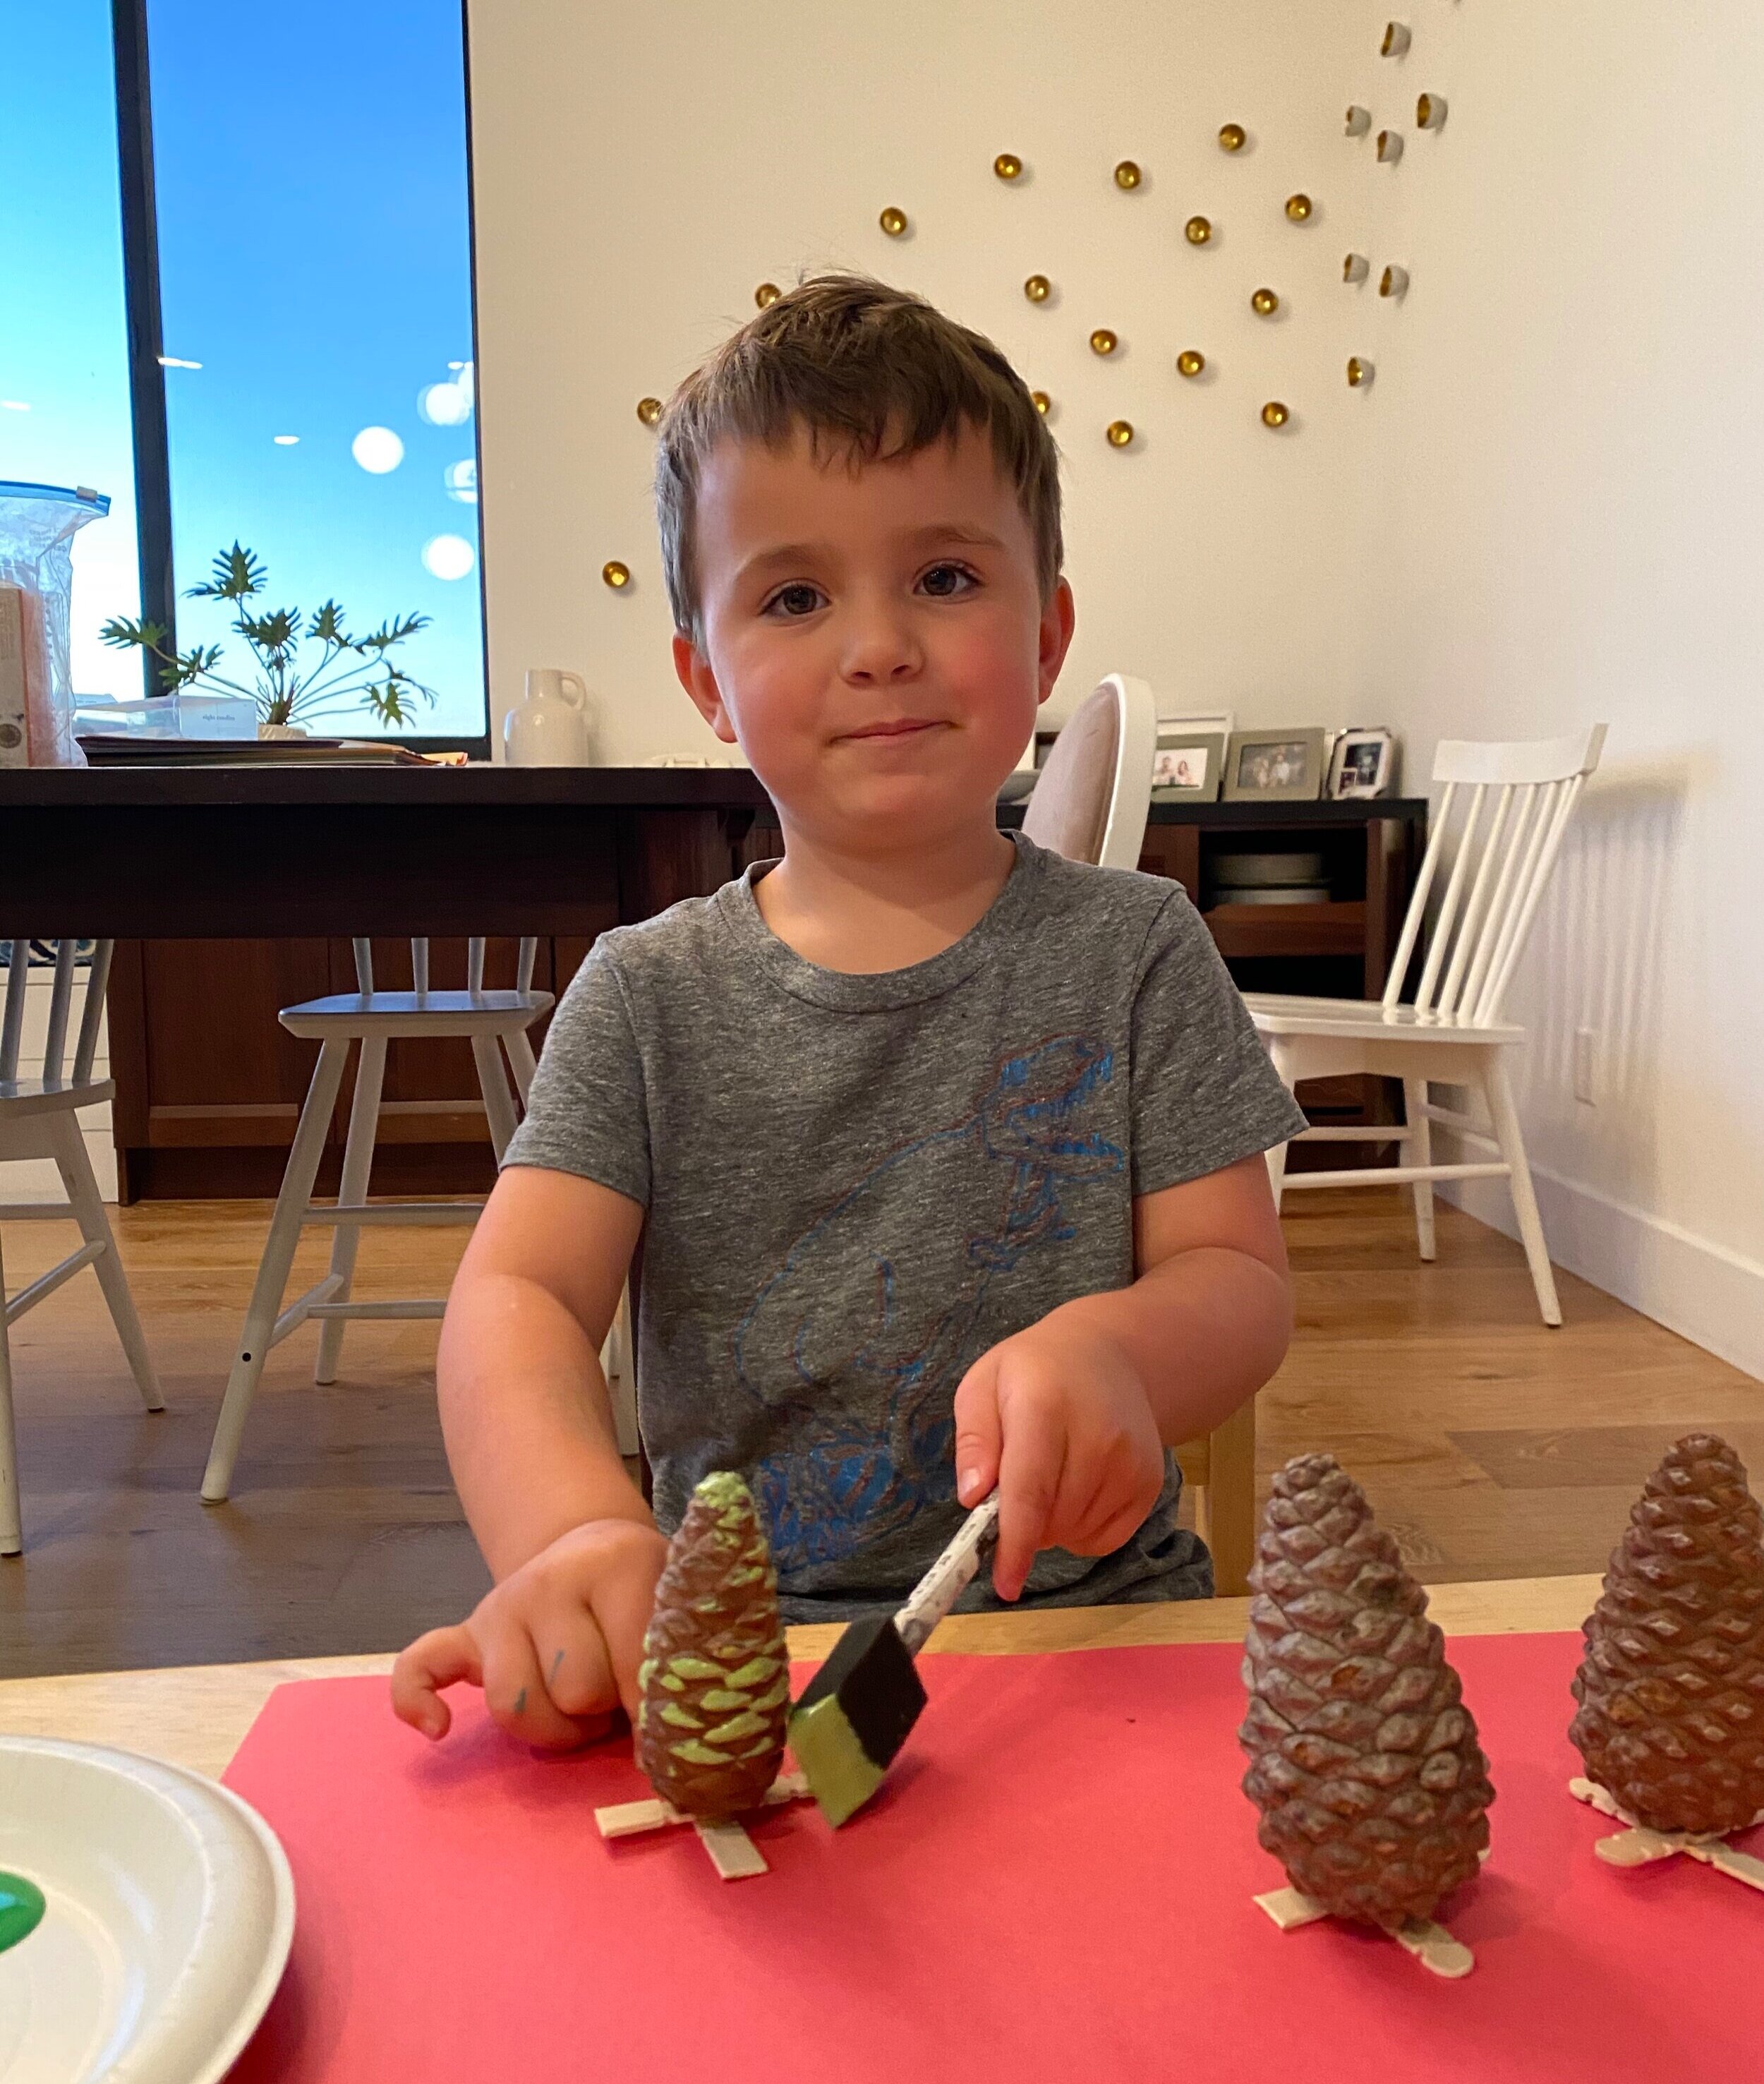
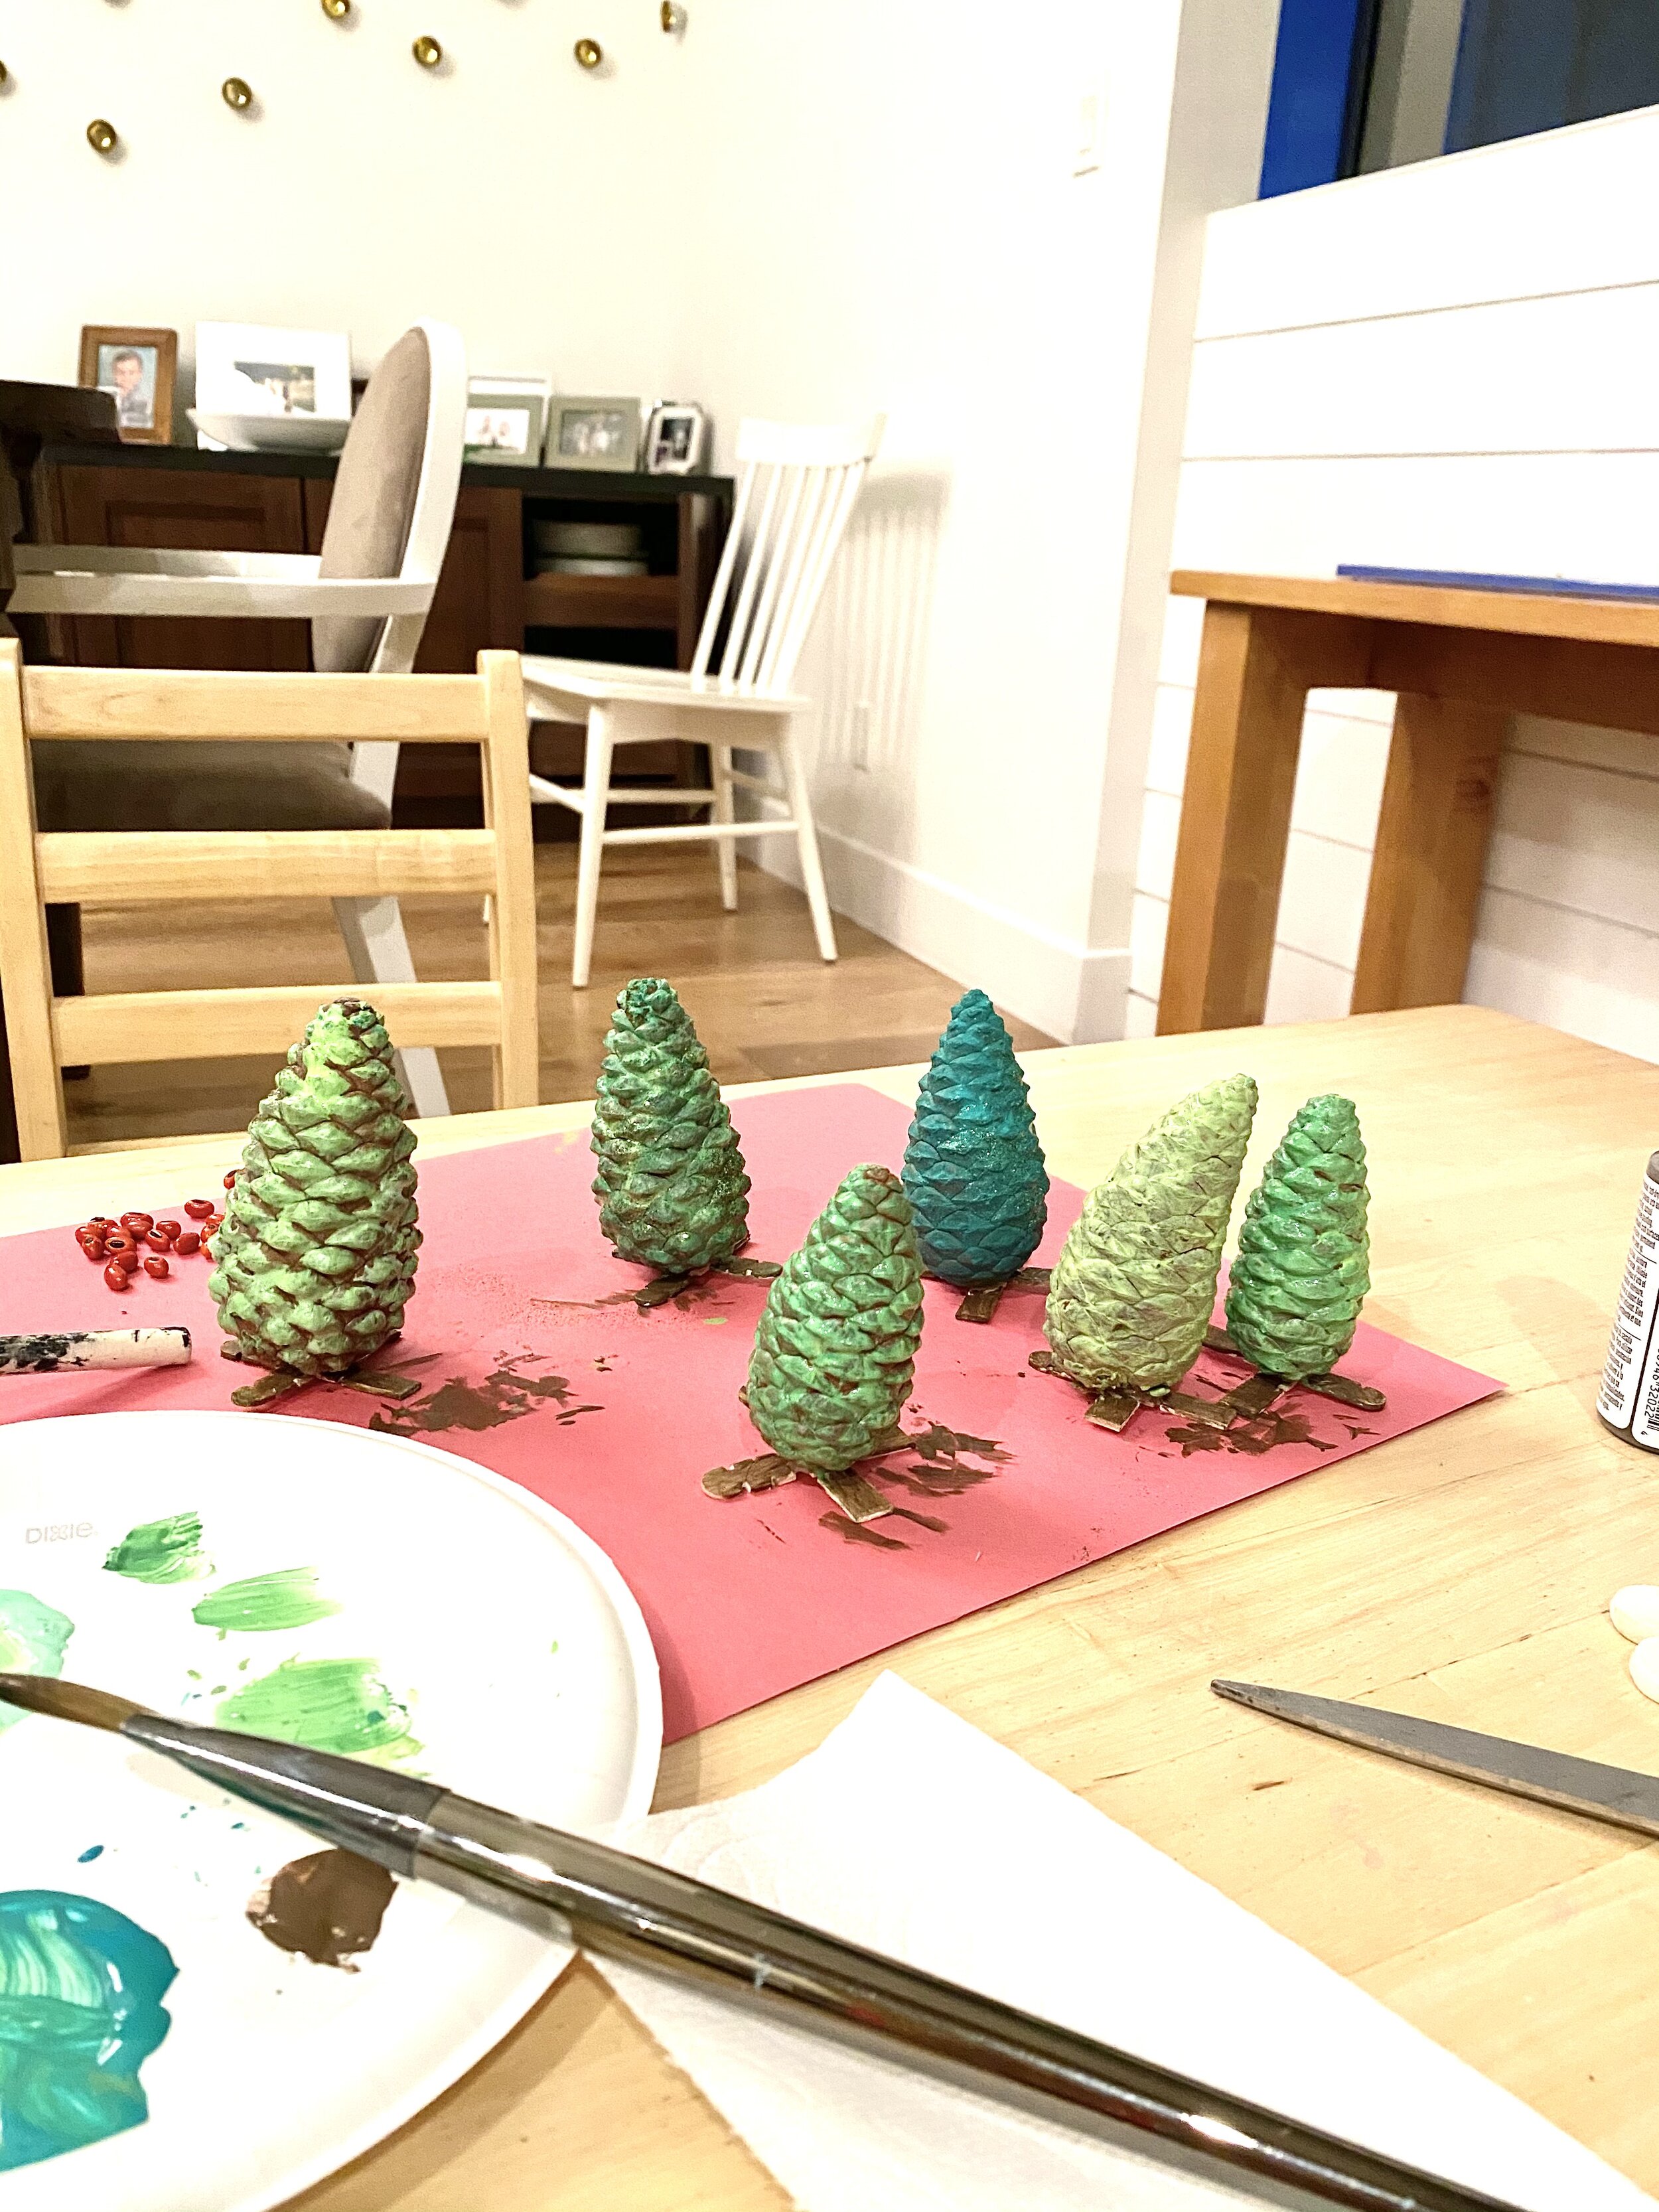
Paint your pine cones. We used non-toxic craft paint in different shades of green. We blended our own shades too. We used a medium sized paint brush and foam sponge brush.
An additional option would be to add “ornaments” or a star to the top. We found little red seed berries that would have made great ornaments.
Be creative and make them your own!
Tag us on instagram and we will share your finished product! @southbayparklandconservancy